 Skip to content
 How to mine Ethereum Classic with BzMiner
BZMiner Ethereum Classic
Ethereum Classic (ETC) mining support was introduced in BZMiner version 2. This guide will walk you through the steps to set up and mine Ethereum Classic using BZMiner.
Important Note:
BZMiner supports four network protocols for Ethereum Classic mining: stratum, ethstratum, ethstratum2, and ethproxy. Be sure to select the correct protocol based on your mining pool’s requirements.
Command Line Interface (CLI) Setup
Download BZMiner:
- Start by downloading the latest version of BZMiner (Windows & Linux).
- Extract the contents of the archive to a suitable location on your computer.
Reference Script:
- Within the extracted files, locate the reference script (
etc.batfor Windows oretc.shfor Linux). This script provides a template for mining Ethereum Classic with BZMiner.
- Within the extracted files, locate the reference script (
Basic Command:
bzminer -a etc -w 000000 -p stratum+tcp://yourpool
- Replace
000000with your Ethereum Classic wallet address. - Replace
yourpoolwith the URL and port of the mining pool you intend to use.
Example:
bzminer -a etchash -w 000000 -p stratum+tcp://us1-etc.ethermine.org:4444
Config.txt Setup
Download and Extract:
- As before, download the latest version of BZMiner and extract the archive.
Edit Config.txt:
In the extracted folder, open the
config.txtfile.Look for the
pool_configssection at the top of the file.Modify the template to include:
- Algorithm: Set to
etchash. - Wallet: Input your wallet address.
- URL: Enter the pool URL(s) you wish to mine to.
- Algorithm: Set to
Example Config:
{
"pool_configs": [{
"algorithm": "etchash",
"wallet": "00000", // replace 00000 with your wallet address
"url": ["stratum+tcp://us1-etc.ethermine.org:4444"], // replace with your desired pool URL. Add multiple pools for failover protection.
"username": "worker_name",
"lhr_only": false
}],
"pool": [0], // the default pool config to use unless overridden
"rig_name": "rig",
"log_file": "",
"nvidia_only": false,
"amd_only": false,
"auto_detect_lhr": true,
"lock_config": false,
"advanced_config": false,
"advanced_display_config": false,
"device_overrides": []
}
Hive OS Setup for Ethereum Classic (ETC) Mining
Visit the Hive OS website: Start by navigating to the Hive OS website to begin the setup process.
Update Hive OS: Make sure your Hive OS rig is running the latest version to ensure optimal performance and compatibility.
Create a Flight Sheet: Head to the Flight Sheets section and start a new one.
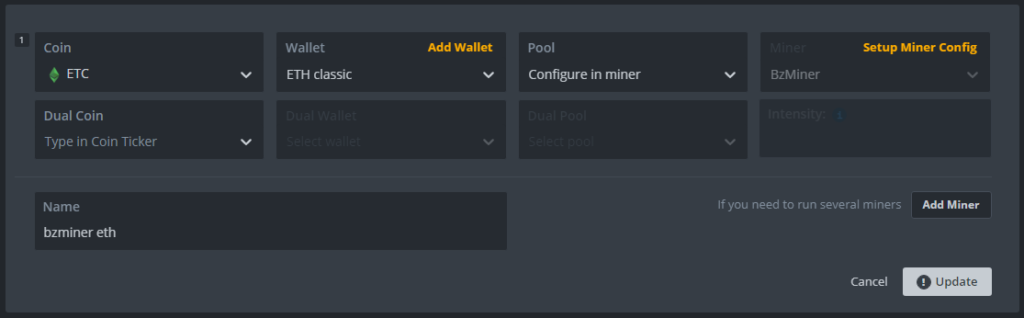
Set the Coin: Select
ETC(Ethereum Classic) as the coin you wish to mine.Add a Wallet: Enter your Ethereum Classic wallet address. If multiple wallet addresses are required, separate them with commas or spaces.
Configure the Pool: Choose “Configure in miner” in the Pool section to manually input the pool settings later.
Choose the Miner: Select
BZMineras your mining software.Name Your Flight Sheet: Assign a unique name to your flight sheet to easily identify it.
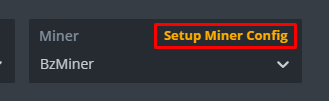
In the Miner section, select Setup Miner Config.
In the BzMiner configuration panel that opens, set the Hash algorithm to etchash.
For the Wallet template, input %WAL% or directly enter your wallet address.
Enter the Pool URL where you intend to mine (e.g., stratum+tcp://us1-etc.ethermine.org:4444).
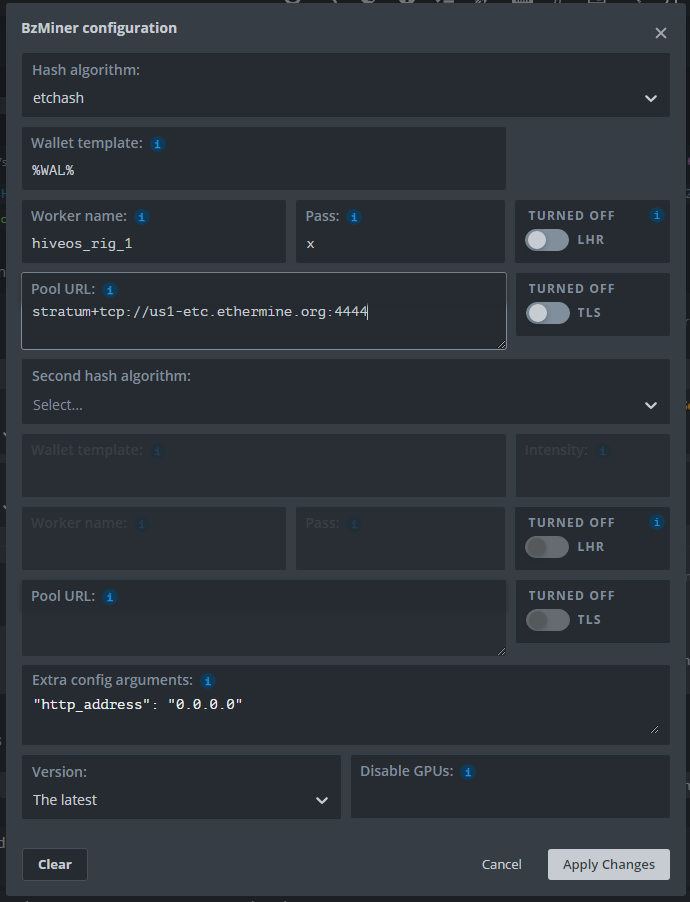
Once configured, click “Apply Changes,” and then deploy the setup to the rigs where you wish to mine Ethereum Classic.
Configuring Arguments in HiveOS
To set config.txt parameters in HiveOS, you can use the Extra config arguments field within the BzMiner configuration window. This allows you to input arguments just as you would in the config.txt file.
For example, to configure overclocking (OC) settings for three devices, you would enter the parameters like this:
Starting from version 8.0.0, BzMiner supports using JSON arrays for oc_ parameters. This approach bypasses the limitations in HiveOS that prevent valid JSON arrays from being used as values.
Example configuration:
"oc_fan_speed": "[-1, 80, 0]",
"oc_power_limit": "[0, 250, 0]",
"oc_core_clock_offset": "[100, 200, 100]",
"oc_memory_clock_offset": "[0, 0, 0]",
"oc_lock_core_clock": "[0, 0, 0]",
"oc_lock_memory_clock": "[810, 0, 810]"